-
Written By Adom Smith
-
Updated on February 28th, 2026
[Solved] Error 0x8004010F “Outlook data file cannot be accessed”
This blog explains the Outlook Error 0x8004010F “Outlook data file cannot be accessed” and how to resolve this error when you have got during using Outlook 2010 or 2013 and while sending/receiving emails.
Error messages in MS Outlook are very common, mainly when the user is working on the exchange server. But, Error 0x8004010F is very frequent and the most annoying error occurring in MS Outlook 2016, 2013 and 2010 as it makes the data inaccessible to you. It appears normally during the ‘Send/ Receive’ process with a message:
“Sending reported error (0x8004010F): ‘Outlook data file cannot be accessed.”
The above error may occur if the Outlook profile is corrupted or the Outlook .pst file or folder has been transferred to another location across the disk or to another computer.
Primary reasons behind the error
- .ost (offline storage table) files have been corrupted.
- Current Outlook profile gets corrupted post its upgrade.
- Change in the location of Outlook data files.
- Outlook profile is not tested properly.
Note: Sometimes “Outlook data file cannot be accessed” due to OST (offline storage table) file corruption, in such condition copy OST to PST file format.
How to resolve the Outlook error 0x8004010f
There are different manual methods for resolving this error. However, I am explaining the resolution method for MS Outlook version 2013 and 2010 when Outlook not sending emails or receiving emails due to error 0x8004010f.
# For MS Outlook 2010
To fix Outlook 2010 error 0x8004010f, you’ll be required to create a new profile using POP3 or IMAP email account, post follows below procedures:
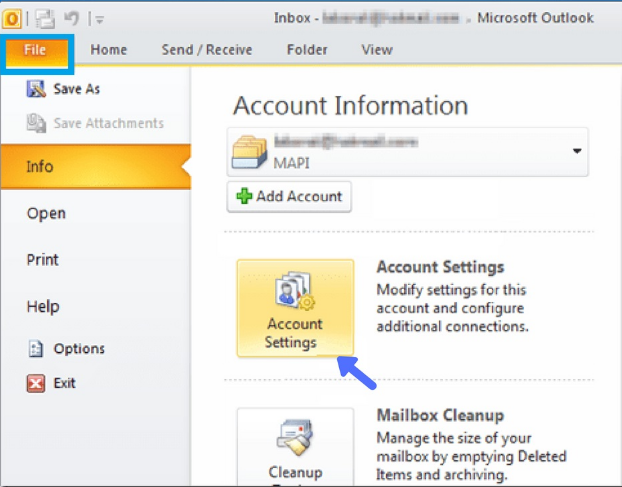
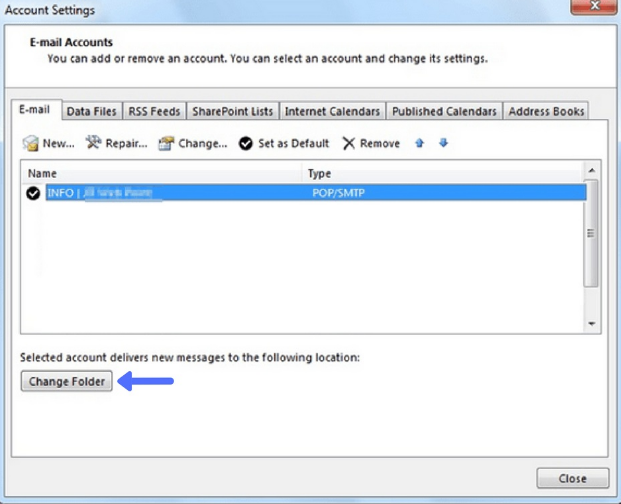
- Open MS Outlook 2010 and go to “Account settings”.
- Click on Email tab in the taskbar and select the account with the issue. Now, click on Change Folder.

- Click on New Outlook data file.
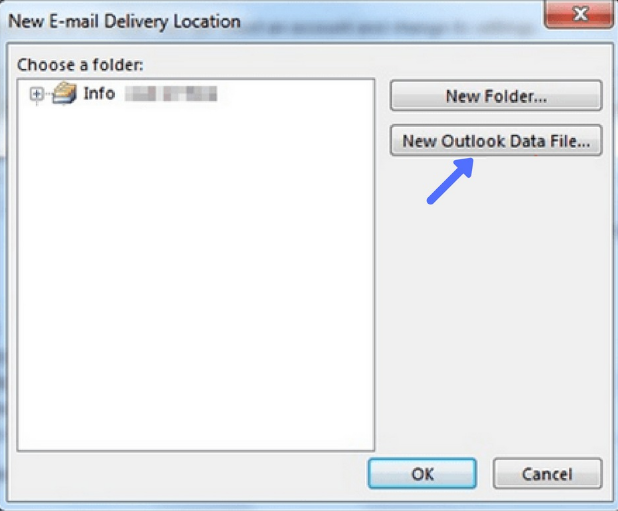
- Name the new data file (e.g. “TEST”) and press “OK”.
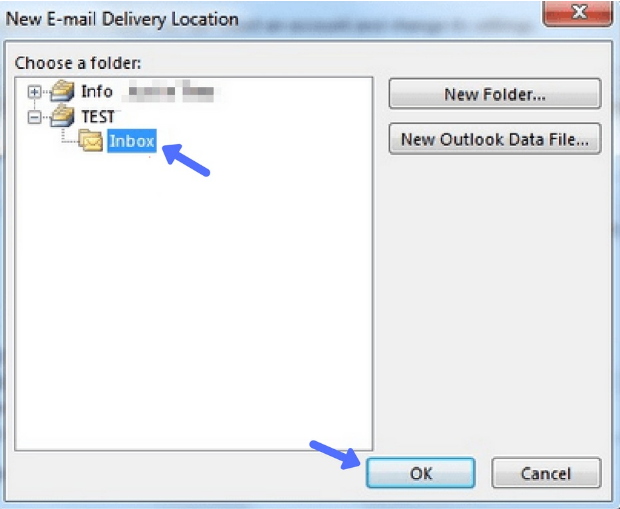
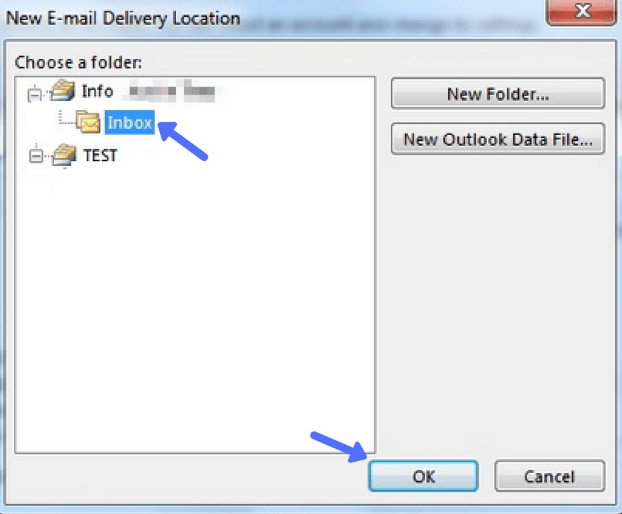
- Now, expand the new data file (e.g. “TEST”) and select the “Inbox” subfolder. Post choose “OK”.
- Go to Account Settings screen and click on “Change Folder” again.
- Now, select the newly created data file and folder where you want to store email messages and then click “OK”.
- Close ‘Account Settings’ and tap on ‘Send/ Receive’ button.
# For MS Outlook 2013
The Outlook error 0x8004010f ”Outlook data file cannot be accessed” for Outlook 2013 can also be fixed by creating a new profile. You can create a new Outlook profile by following the below procedure.
Create profile via Auto account setup
- Open the Control Panel and click on Mail option.
- In the ‘Mail Setup- Outlook’ window select ‘Show Profiles’.
- Select your current Outlook profile and then click on Add.
- Name the profile created in New profile dialog-box and click OK.
- Give the email information in the Add new account window and click Next.
- Click on Finish once the process completes.
Create profile via a manual account setup
- Open the Control Panel and click on Mail option.
- In the ‘Mail Setup- Outlook’ window select ‘Show Profiles’.
- Select your current Outlook profile and then click on Add.
- Name the profile created in New profile dialog-box and click OK.
- In ‘Add New Account’ window, select ‘Manually configure server settings or additional server types’ and click on ‘Next’.
- From the “Choose service” dialog box, select “Internet mail” and click Next.
- The ‘Internet E-mail settings’ dialog box will open. Type your account details.
- Click “Test Account Settings” for testing your account.
- Choose the ‘Existing Outlook Data File’ option and then click on Browse.
- The ‘Open Outlook Data File’ dialog box will open. Select the Outlook data file you have located earlier.
- Click OK and then Next.
- Now, close the window and click Finish.
After creating a new profile, the next step involves setting up of this account as the default profile. Follow below procedure for this.
Configure newly created profile as the default profile
- Open the Control Panel.
- The ‘Mail Setup – Outlook’ dialog box will open. Click Show Profiles.
- Choose the option ‘Always use this profile’ and select the new profile from the drop-down menu. Click OK.
The error ‘Outlook data file cannot be accessed’ can also be displayed in the form of other similar messages. The statement for the error message may be different, but the reason and causes are almost the same in all the cases. Another text message that might appear is:
“0x8004010F: The operation failed. An object could not be found”
However, if you have installed MS Outlook 2016 on your system and face the same issue, you’ll have to transfer the data files in order to fix “Outlook data file cannot be accessed” error. Due to a slight change in MS Outlook 2016 features from that of the previous versions, this resolution step may create an impact.
Concluding Words
If none of the above manual methods work, check the email account. There might be some damage in the PST file of Outlook. You can repair the Outlook PST file with the help of a third-party Outlook PST Recovery software tool which can restore all your mail items and make your Outlook account accessible to you.
About The Author:
Adom Smith is a DataRecoveryHelp Technology Writer. He is a technology enthusiast with over 3 years of experience in Data Recovery, IoT, Artificial Intelligence, and Robotics. He enjoys researching and sharing DIY solutions as well as tips and tricks for resolving Windows technical issues.
Realted Post